The steps for operate and debug of ultrasonic vibrating sieve are as follows:
ultrasonic vibrating sieve operate steps:
- Preparation: make sure that the ultrasonic vibrating sieve and related equipment are in good working condition, and the powder samples to be screened are ready.
- Setting parameters: according to the characteristics of the powder and the desired screening effect, set the vibration parameters of the ultrasonic vibrating screen, such as amplitude, frequency and so on. Different powders may require different parameter settings, so it needs to be adjusted according to the actual situation.
- Start the equipment: put the powder sample into the screen mesh of the ultrasonic vibrating screen and start the equipment.
- Working principle of ultrasonic screening systems: the ultrasonic generator produces ultrasonic waves, and the ultrasonic vibration motor conducts the ultrasonic waves onto the screen mesh. The action of ultrasonic waves will cause high-frequency vibration of powder particles, thus improving the screening effect.
- Sieving process: Under the action of ultrasonic waves, the powder sample will be vibrated by the screen mesh and excited by ultrasonic waves, the smaller particles will pass through the screen mesh, while the larger particles will be blocked on the screen mesh. By adjusting the parameters of the ultrasonic vibrating screen, the range of particle size can be controlled.
- Analysis of sieving results: Particle analysis and evaluation is performed based on the sieved samples collected during the sieving process. The sieving results are adjusted and reprocessed as required.
Commissioning steps:
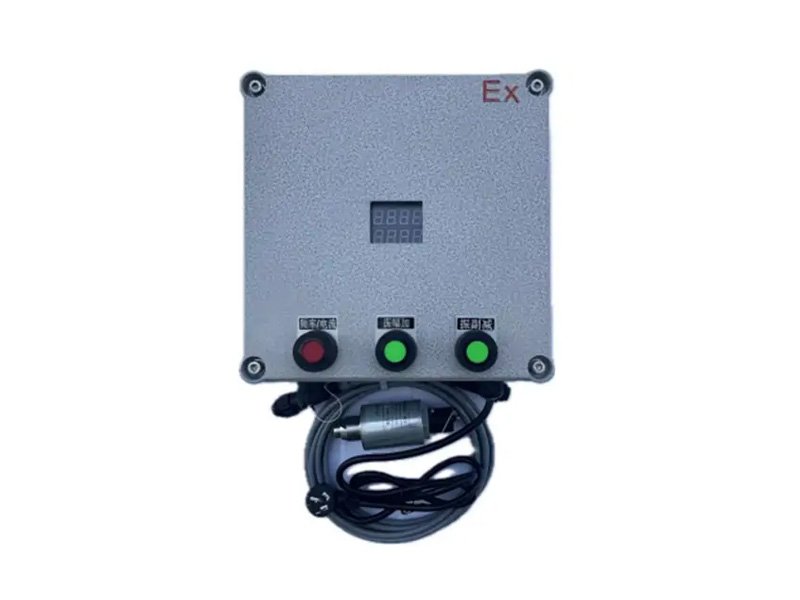
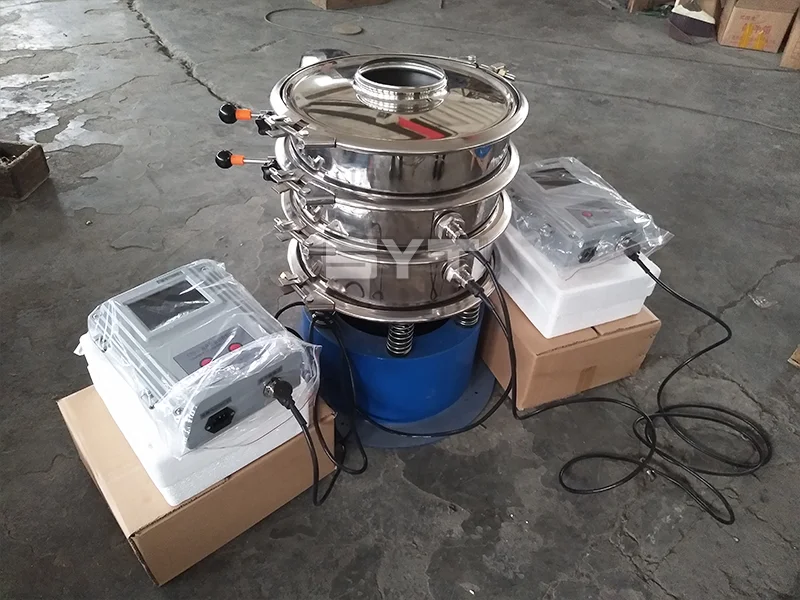
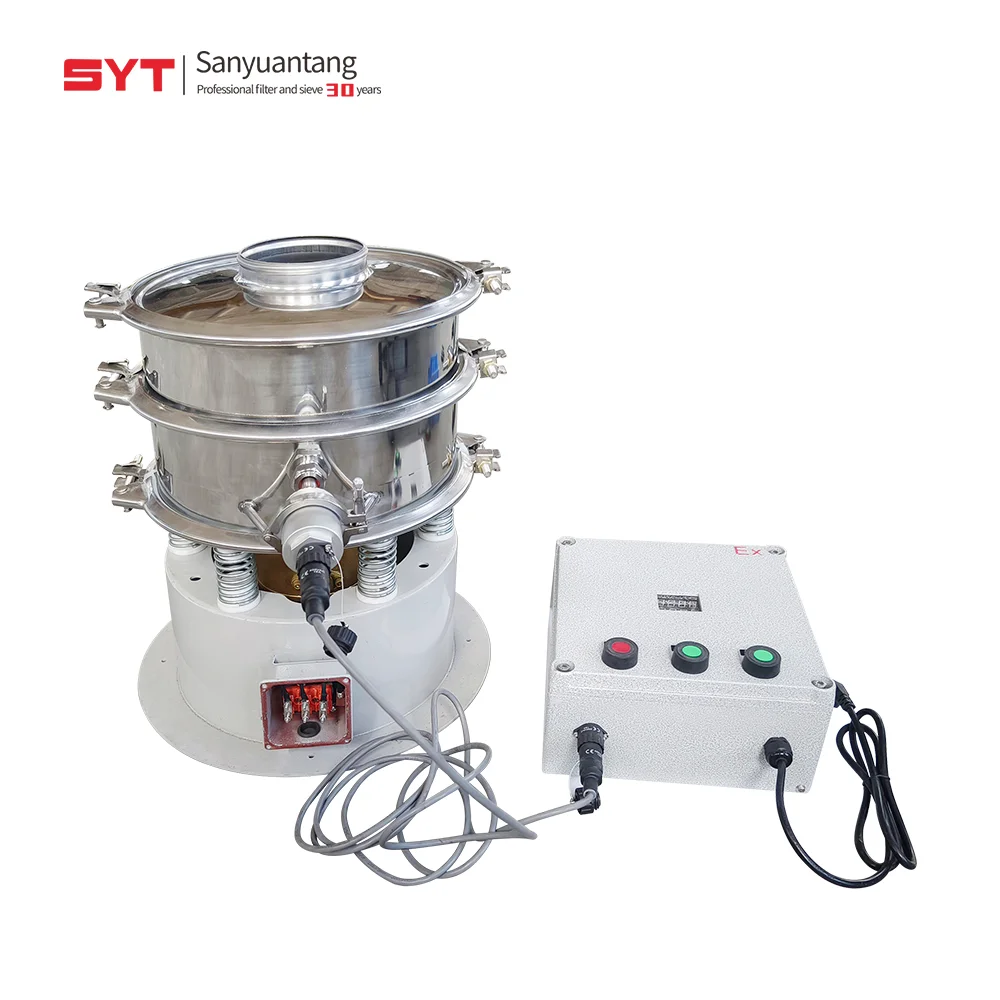
- Check the equipment: according to the name diagram of each part of the equipment, carefully check the ultrasonic vibrating screen for any abnormality, and if there is any abnormality, contact the supplier in time.
- Power supply and wiring: make sure that the ultrasonic controller and the rotary vibrating screen are powered separately, the rotary vibrating screen is a three-phase power supply, the ultrasonic power supply is a single-phase power supply, and both of them need to be reliably grounded. The ultrasonic resonant power supply rear panel junction box has red (positive) and black (negative) two terminals, the ultrasonic cable will be connected to the red and blue wire and connect, and check whether the connection is reliable.
- Debugging power supply: connect the ultrasonic resonance power supply and ultrasonic connecting cable, and check the ultrasonic power switch. With a “drop” sound, the ultrasonic resonator power supply starts, the display window shows “P0”, and enters the self-test state. After a few seconds, the display window shows the working current, and the frequency is automatically searched, 30 seconds after the ultrasonic resonator power supply is in normal operation. Touch the screen with your hand, the vibration of the screen is obvious.
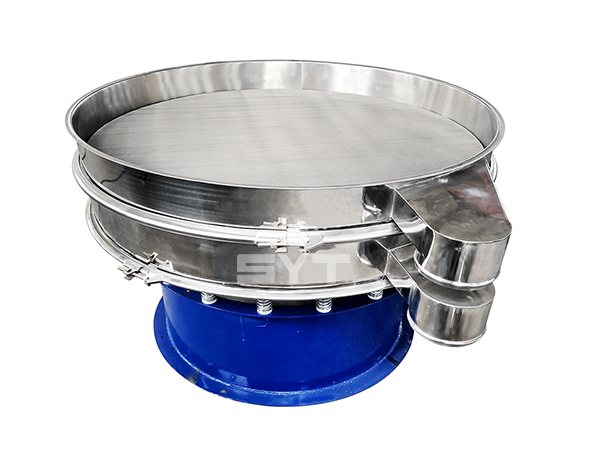
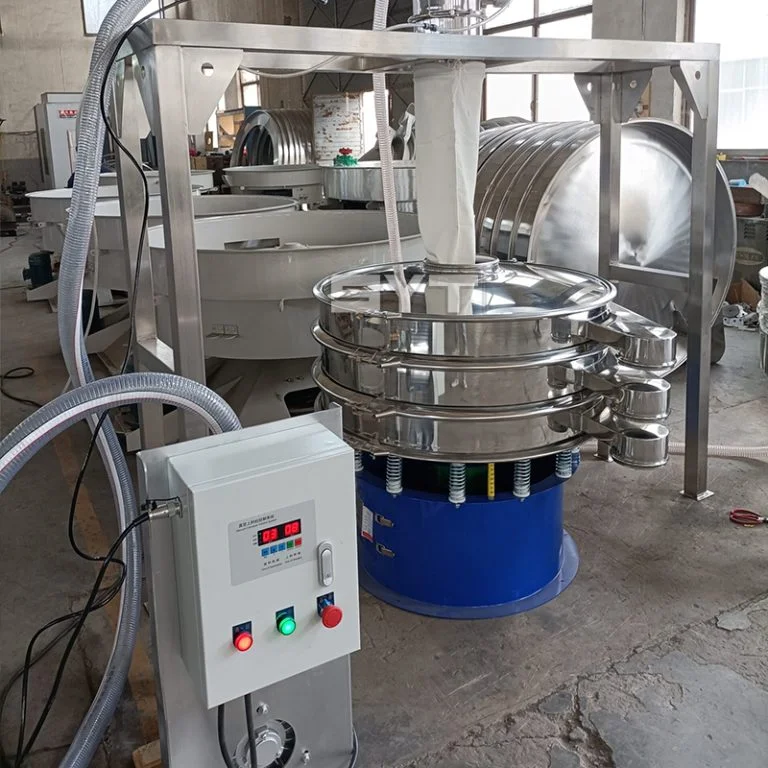
- Adjust the screen mesh: each layer of the ultrasonic vibrating screen can do 360°rotation, loosen the locking ring bolts, adjust the required position of each layer of the outlet, and then tighten the locking ring bolts.
- Adjust the upper and lower hammers: changing the phase angle of the upper and lower hammers of the ultrasonic vibrating screen can change the trajectory and residence time of the material on the screen, which should be adjusted to the best state according to the demand of the material and the screening effect.
Please note that when debugging and using the ultrasonic vibrating screen, you need to follow the instructions for the use of the equipment and the safety operating procedures to ensure correct and safe operation. If you have any questions or problems, you should consult the supplier or professional technicians in time.